How to record a payment
This tutorial shows how to apply a payment to a fictional invoice, with email notifications turned off.
- Video: video.mp4 (English voiceover, 2:28)
- Recorded on: the public Invoice Ninja React demo at https://react.invoicing.co/demo, Monday 16 November 2026 (America/Buenos_Aires)
- Sample data: payment of $150.00 against invoice 0029 for Pinecone Demo Services (FICTIONAL)
Do not leave Send Email on when you save a payment on the public demo. The switch is on by default. Click the switch itself to turn it off (clicking the “Send Email” label does not toggle it).
What you’ll do
- Find the invoice with a balance due
- Open Enter Payment from Actions
- Turn off Send Email
- Save the payment
Before you start
A draft invoice has no balance due, so it will not appear as payable. If your invoice is still a draft, open its Actions menu and choose Mark Sent. That only updates the status; it does not email the client. Do not choose Email Invoice.
In this recording, invoice 0029 is already marked sent and shows a $150.00 balance. The shared demo may also list earlier fictional invoices (for example a paid 0028).
Step 1. Find the invoice
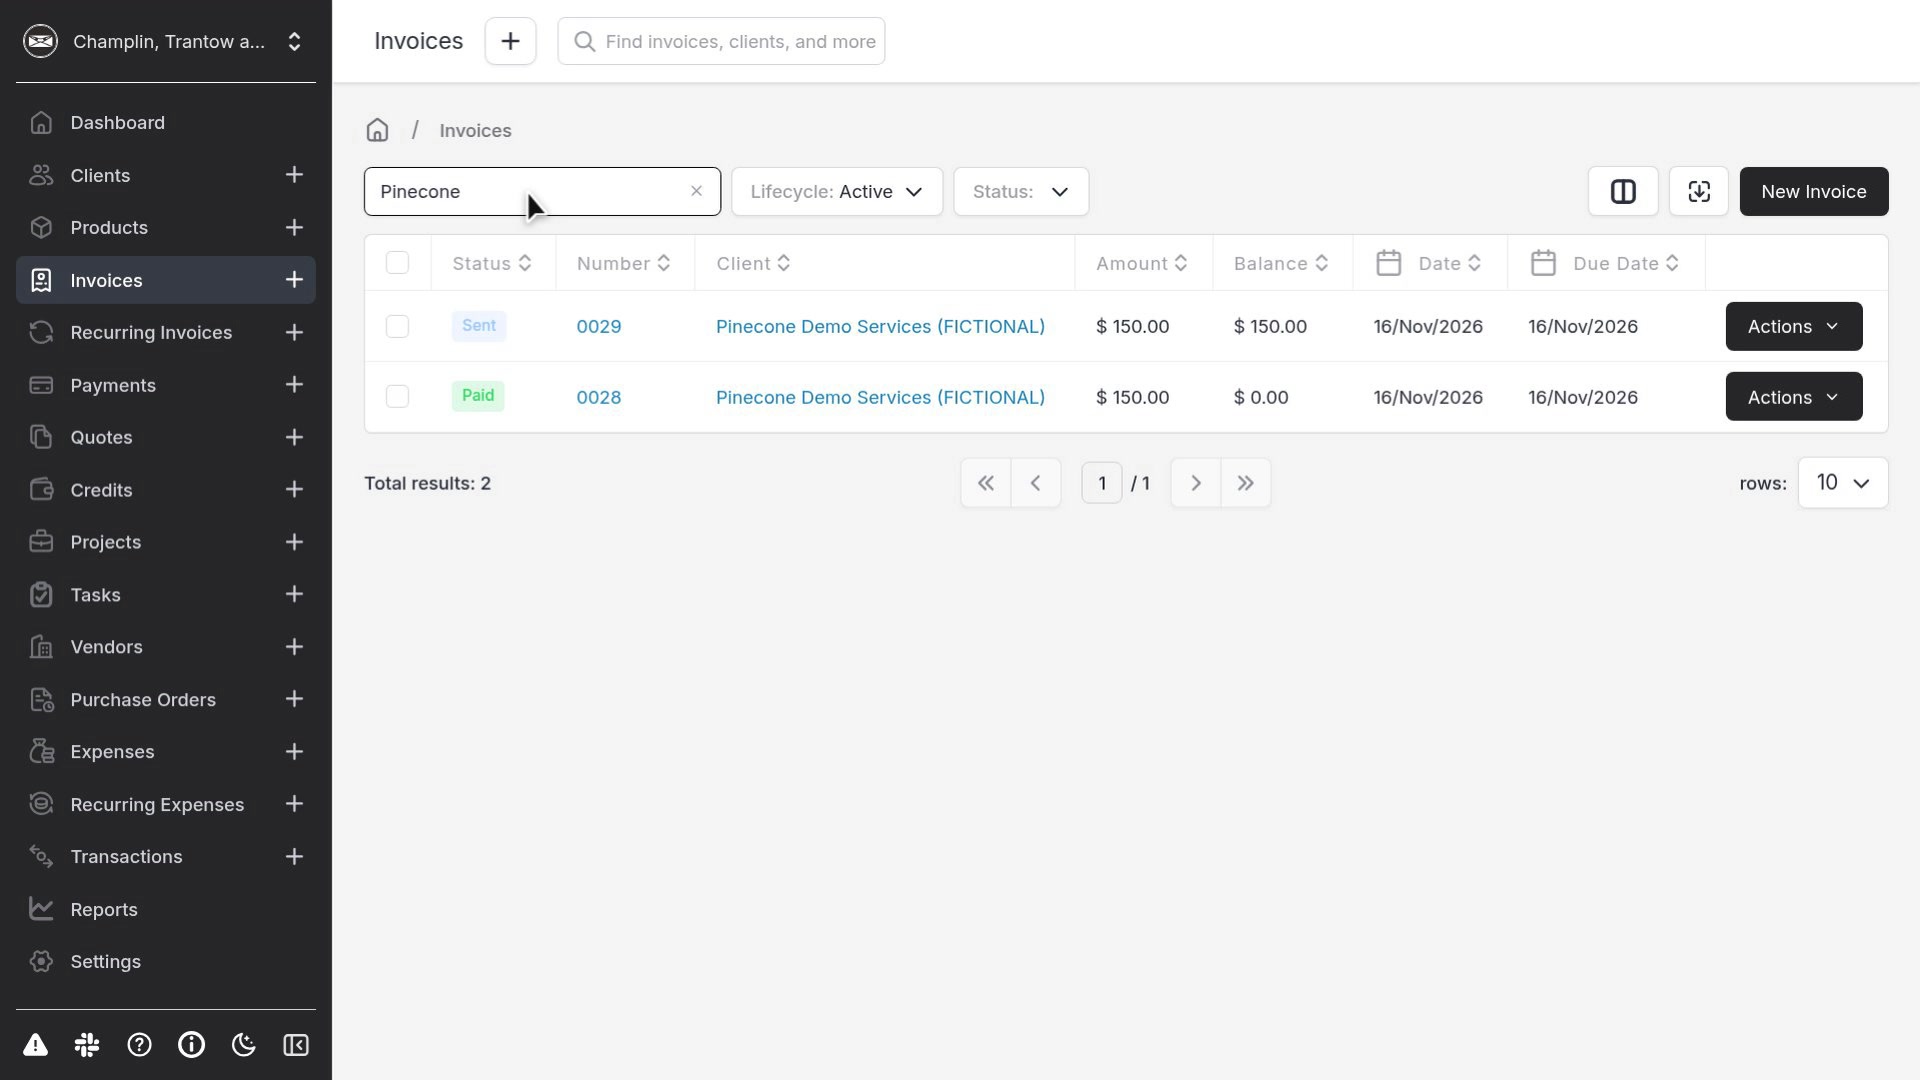
Open Invoices and type part of the client name in the Filter box, for example Pinecone. Use the invoice that still has a balance due.
Step 2. Enter Payment from Actions
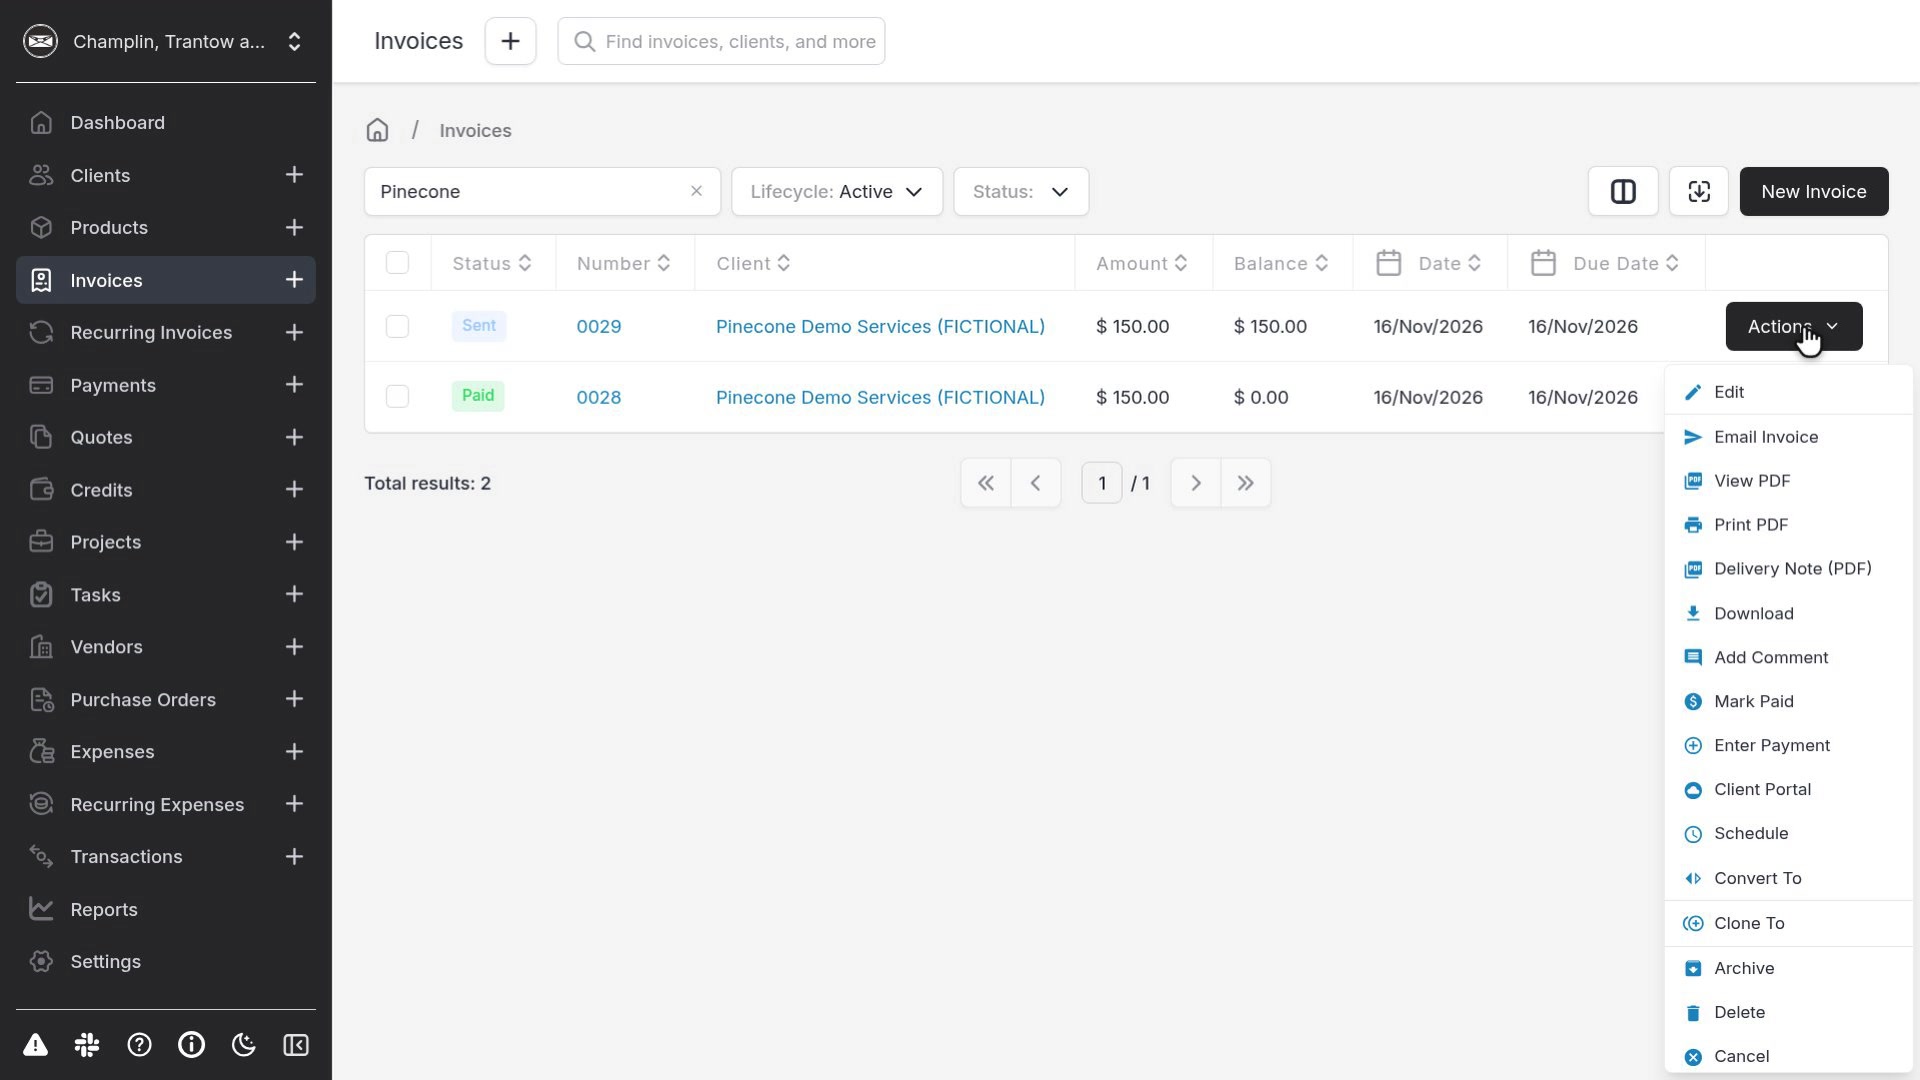
Open the Actions menu on that invoice. The menu includes Email Invoice, Mark Sent, and Enter Payment. Choose Enter Payment. Do not click Email Invoice.
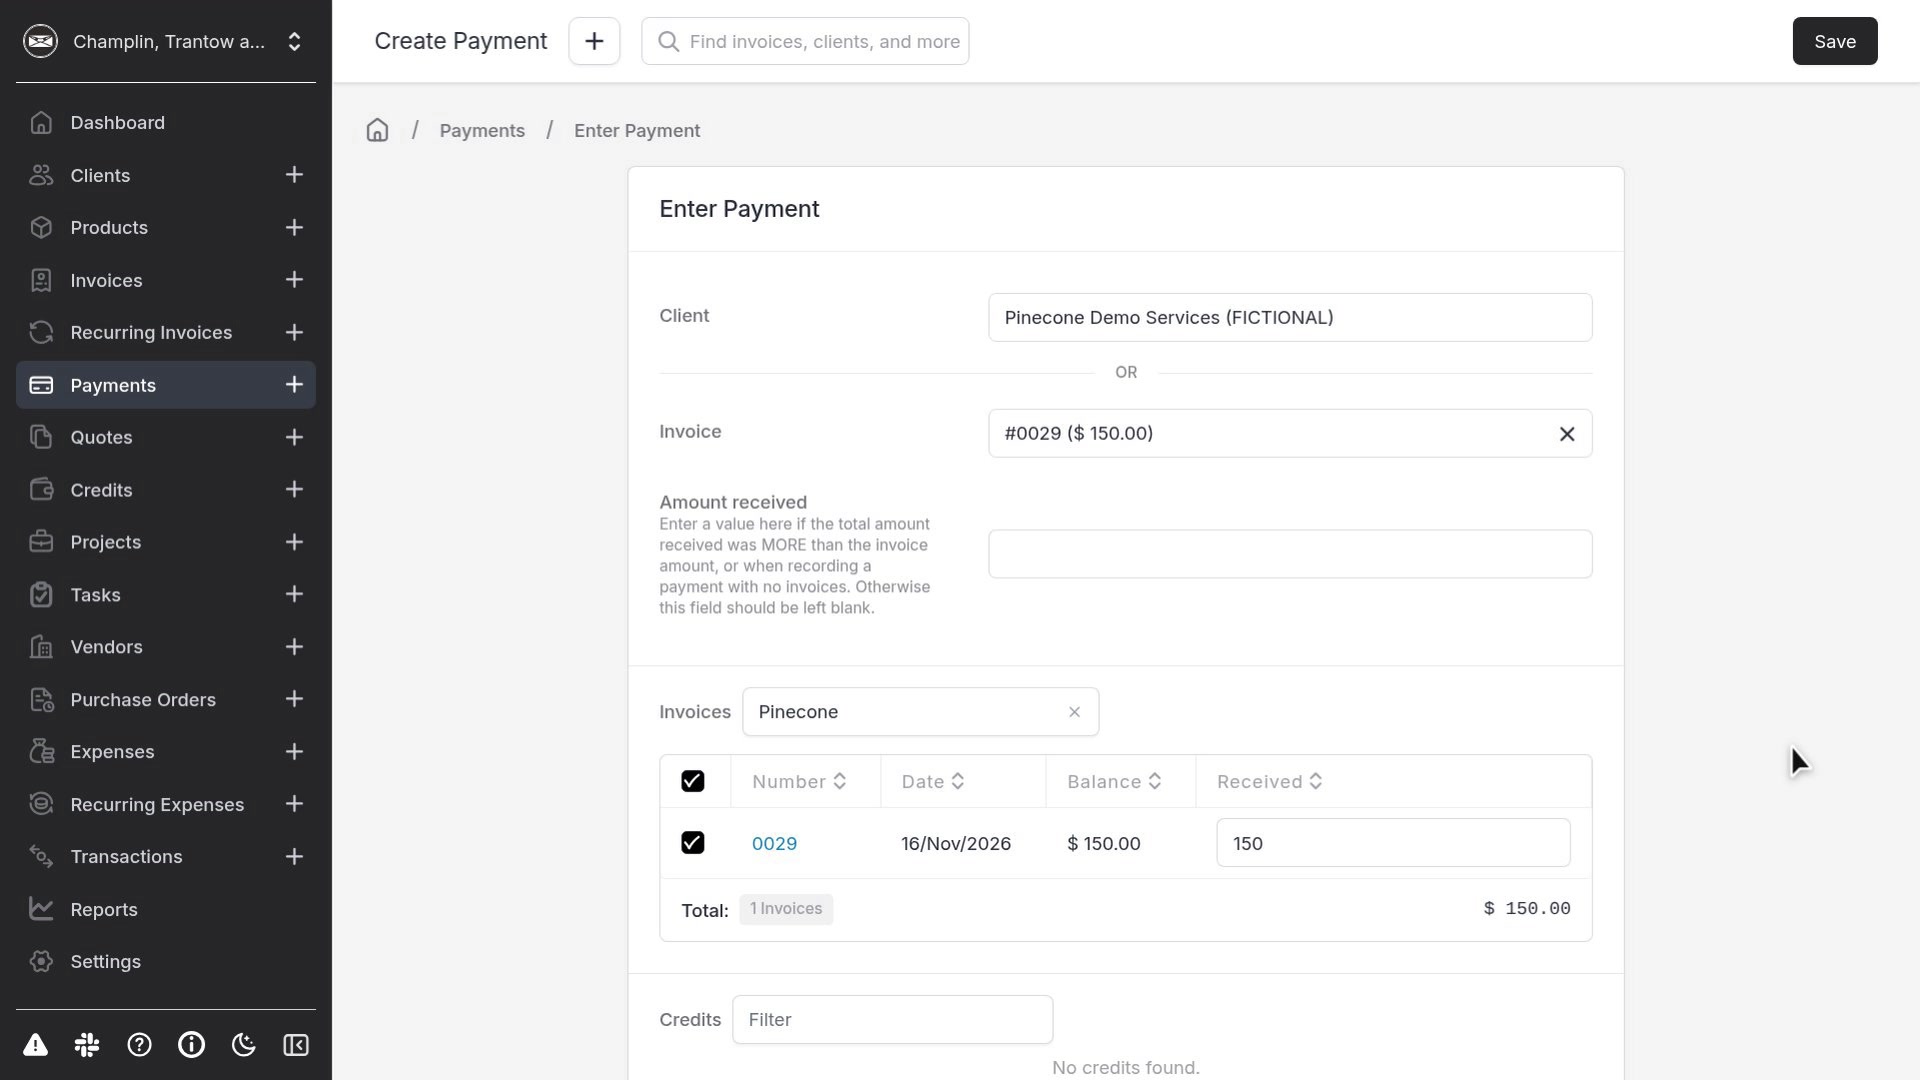
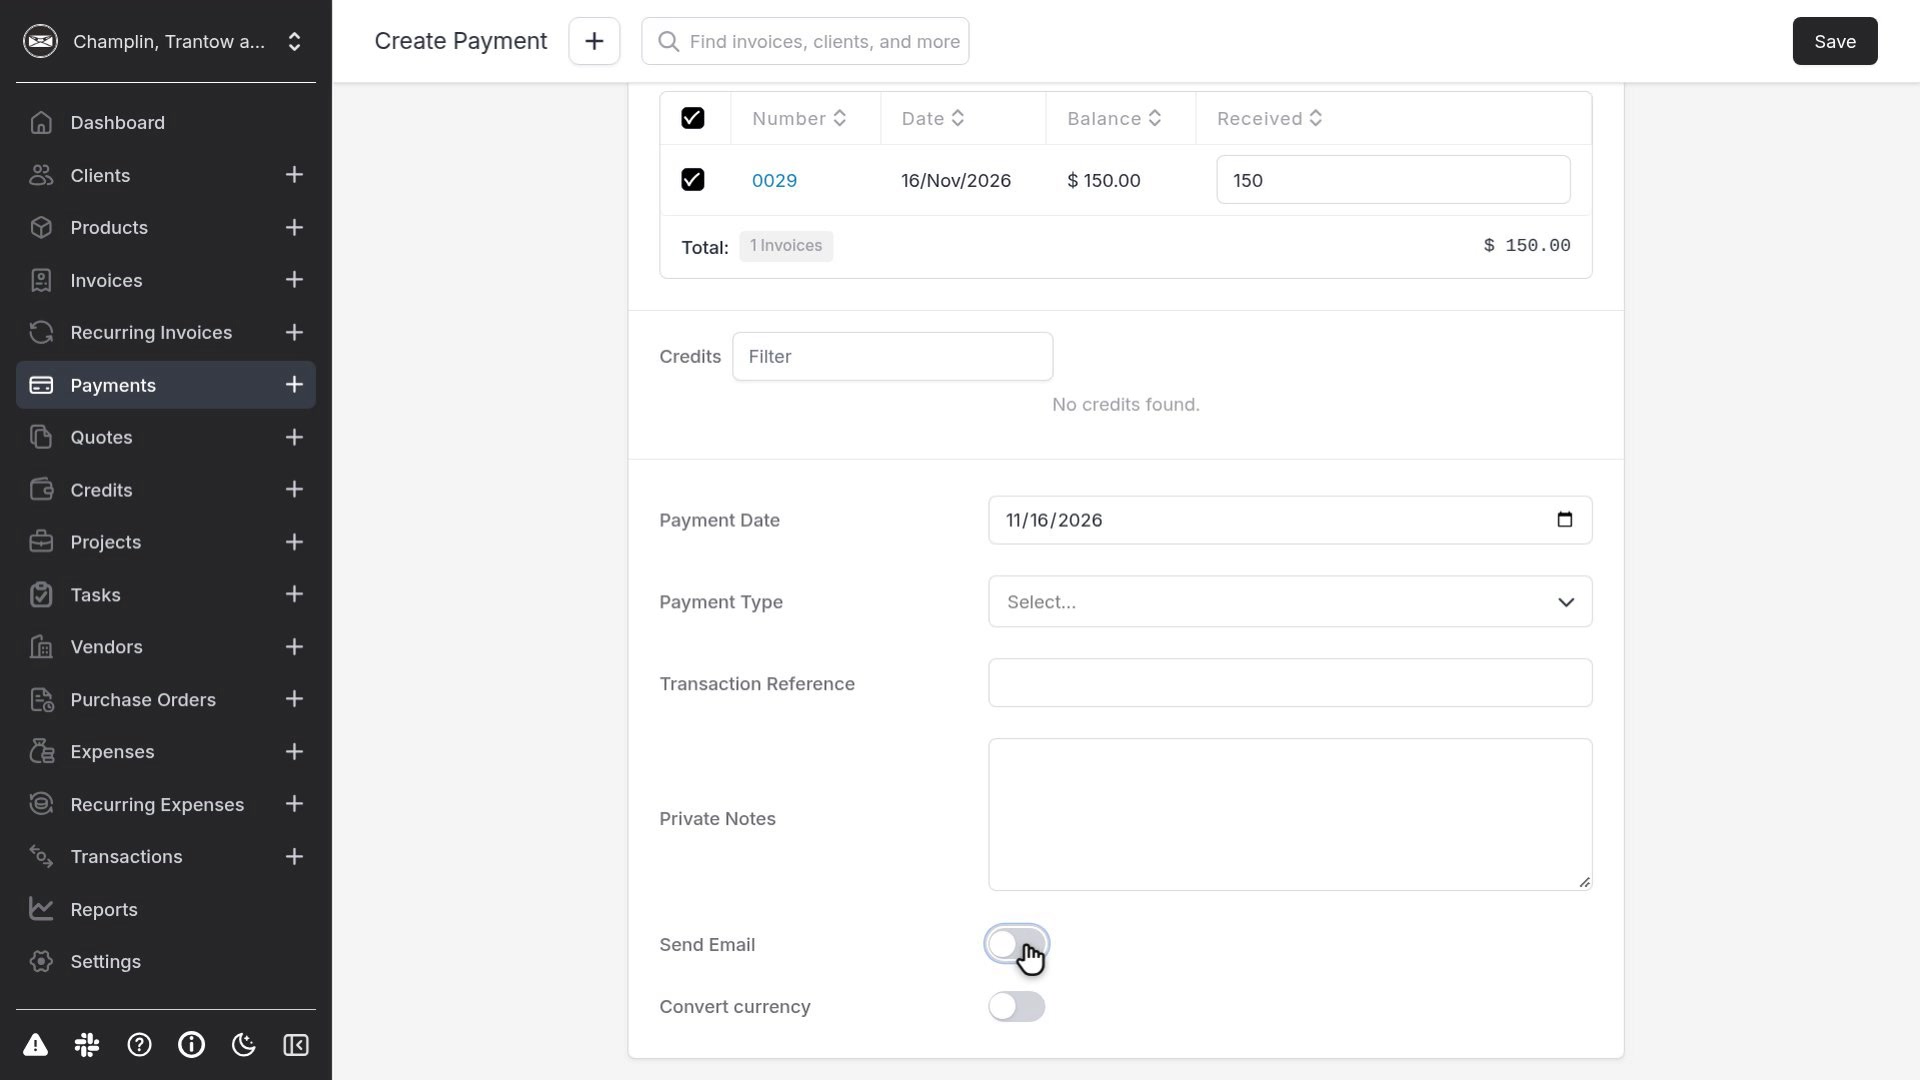
Invoice Ninja opens the payment form with the client and invoice already filled in: Pinecone Demo Services (FICTIONAL), invoice #0029 ($150.00), received amount 150, total $150.00. Leave Amount received blank when you are applying the payment to the listed invoice.
Step 3. Turn off Send Email
Scroll down. Send Email is on by default.
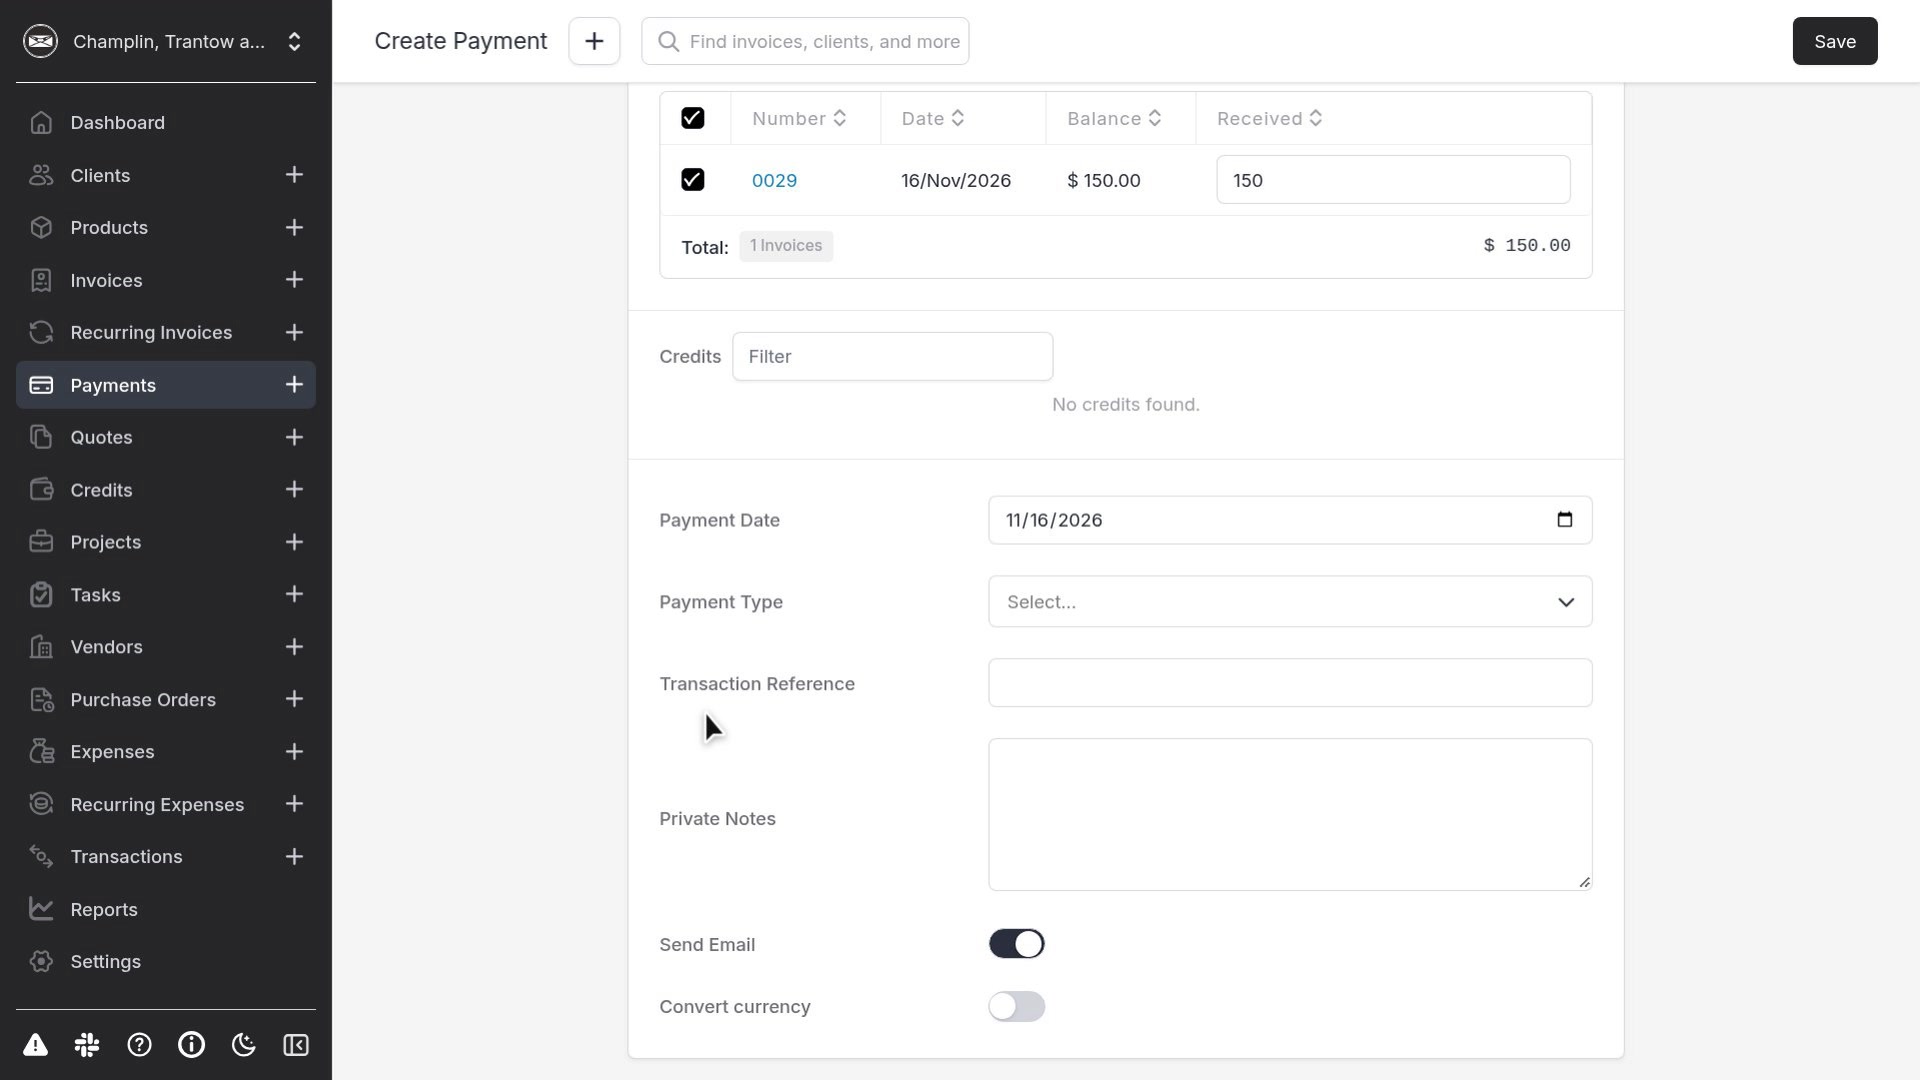
Click the Send Email switch so it turns off. Confirm that the toggle is in the off position (light track, knob to the left) before you continue. Clicking the “Send Email” text label alone does not change the switch.
No payment card or gateway details are required for this kind of recorded payment; it only logs the payment in Invoice Ninja.
Step 4. Save and confirm
Click Save in the top right. Invoice Ninja opens the payment record. In this walkthrough it is payment #0016, status Completed, amount $150.00 applied to invoice 0029 on 16 November 2026, for Pinecone Demo Services (FICTIONAL).
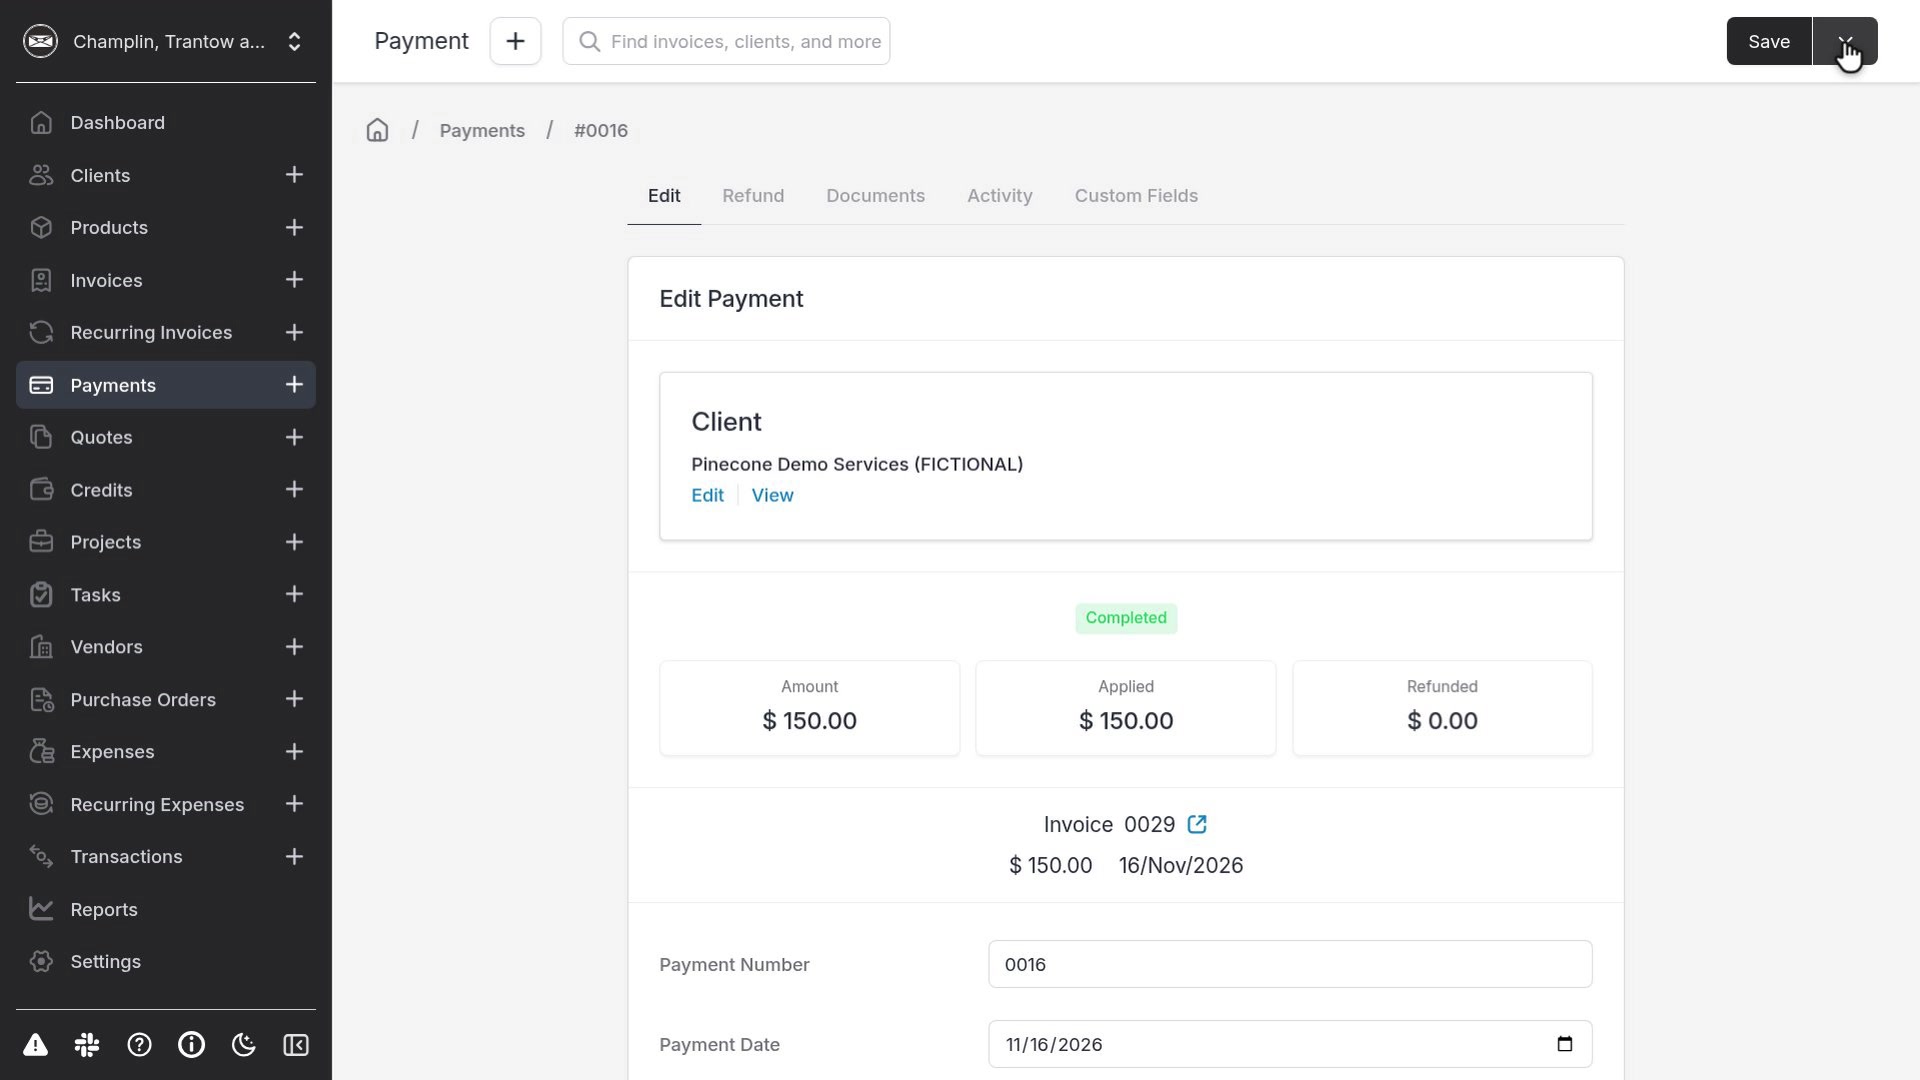
The invoice balance should now be $0.00, and the invoice status should show as paid.
Notes
- Always turn Send Email off on the public demo before you click Save.
- Mark Paid in the Actions menu is a different shortcut and is not used in this tutorial.
- This demo’s email history states that sending is only available with Postmark or Mailgun. Still, do not use Email Invoice or leave Send Email on.