How to create and send an invoice
This tutorial walks through Invoice Ninja’s New Invoice wizard: choose a client, add a line item, review the preview, and save a draft.
Important: the last step of the wizard includes Email Invoice, which would send a message to the contact on file. This walkthrough was recorded on a shared public demo, so we do not click Email Invoice. We save a draft instead and explain what you would do in your own account.
- Video: video.mp4 (English voiceover, 3:18)
- Recorded on: the public Invoice Ninja React demo at https://react.invoicing.co/demo, Monday 16 November 2026 (America/Buenos_Aires)
- Sample data: client Pinecone Demo Services (FICTIONAL); line item Fictional onboarding workshop (demo only) at $150.00
What you’ll do
- Start a new invoice
- Choose the client and a line item
- Review the invoice
- Save a draft — not Email Invoice
Step 1. Start a new invoice
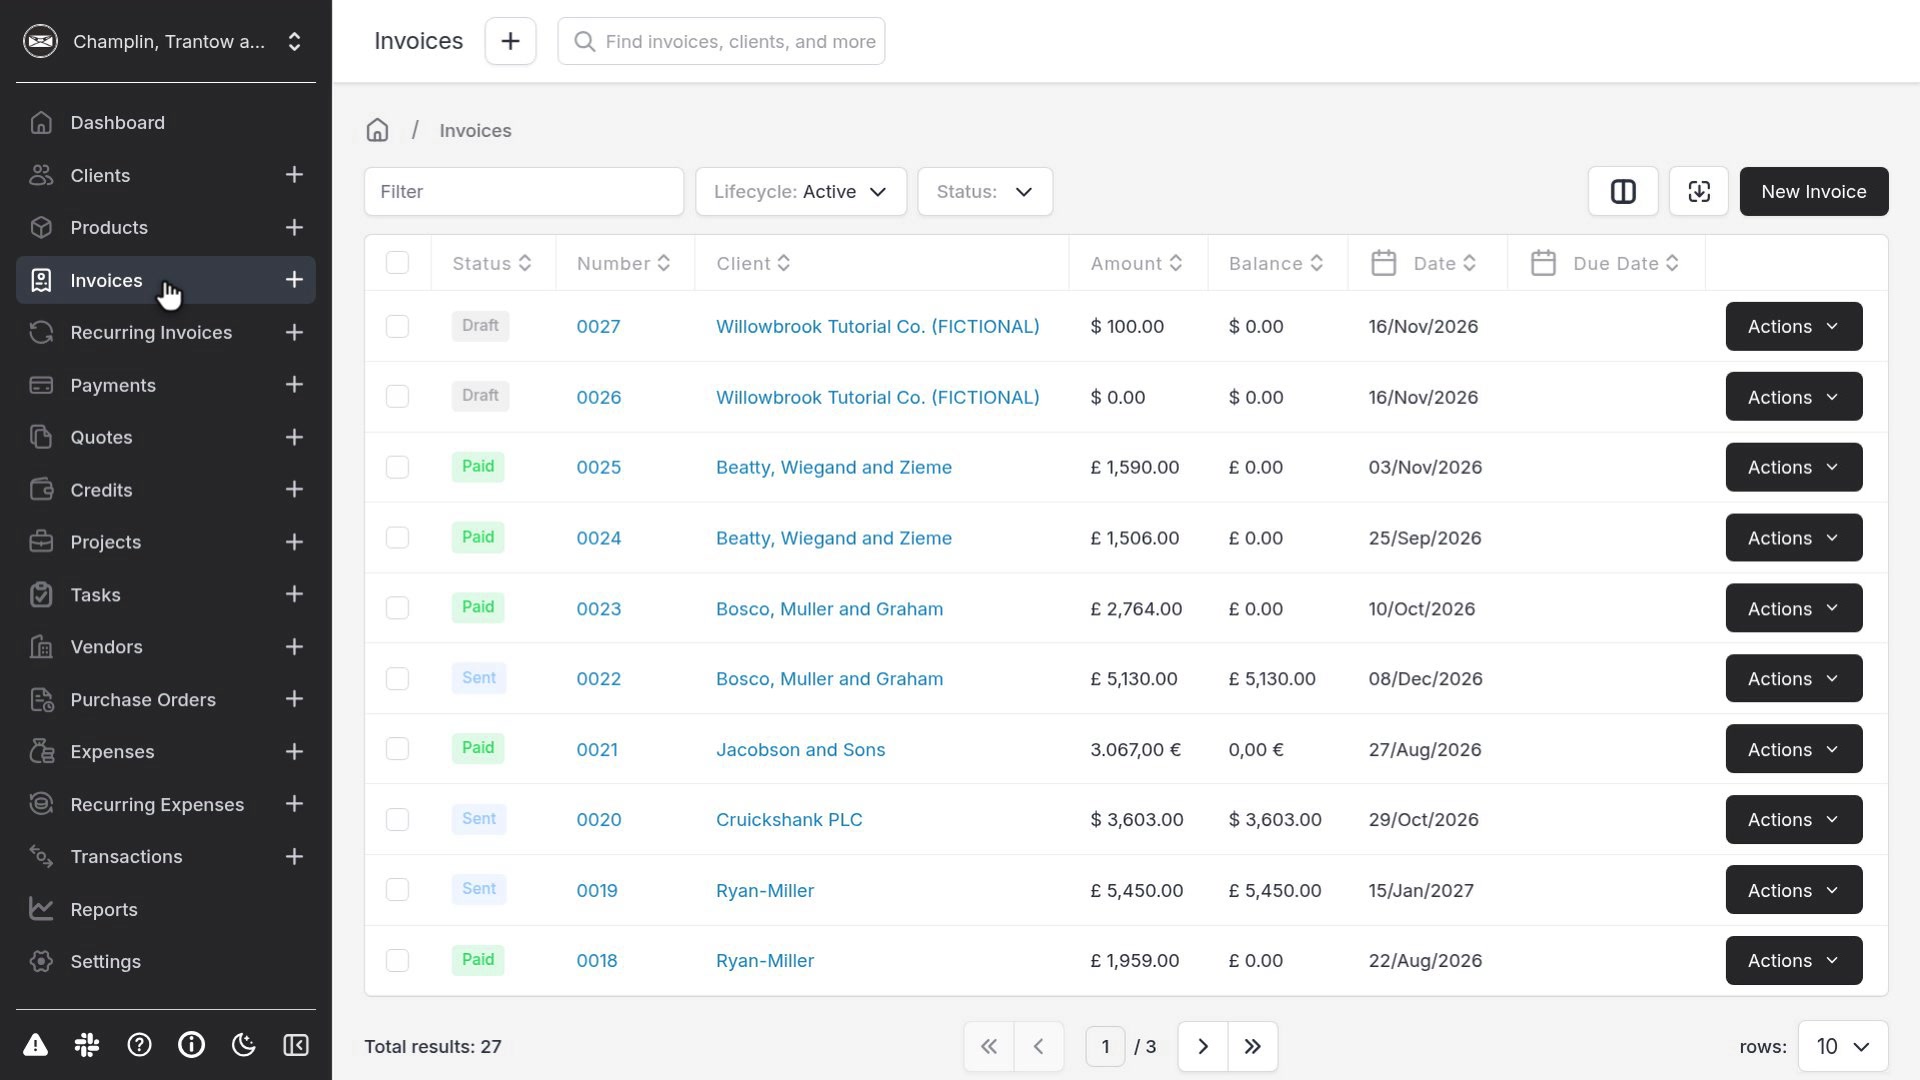
Open Invoices in the sidebar, then click New Invoice. In this demo, that opens a five-step wizard (not the classic full invoice form).
Step 2. Choose the client
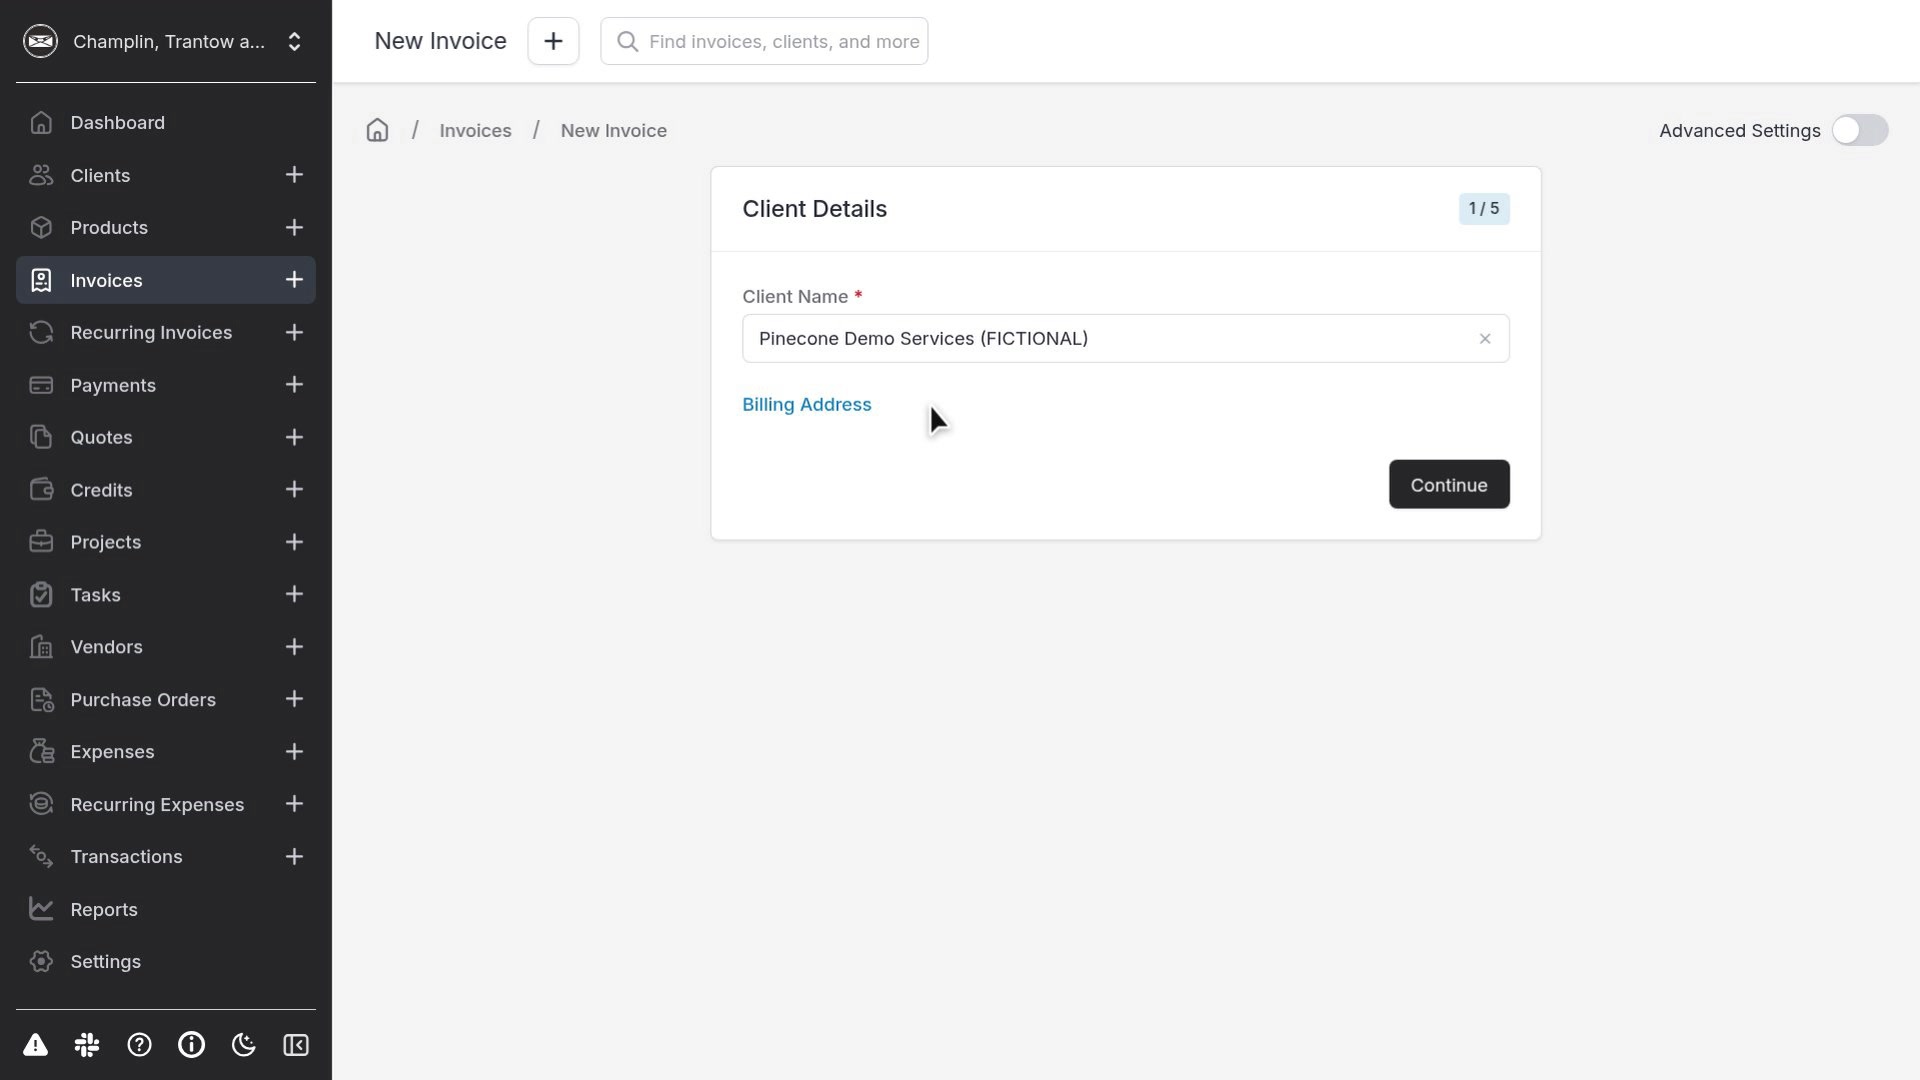
Step 1 of 5 is Client Details. In Client Name, type part of the company name and select Pinecone Demo Services (FICTIONAL) — the fictional client from the previous tutorial. Then click Continue.
Step 3. Add a line item
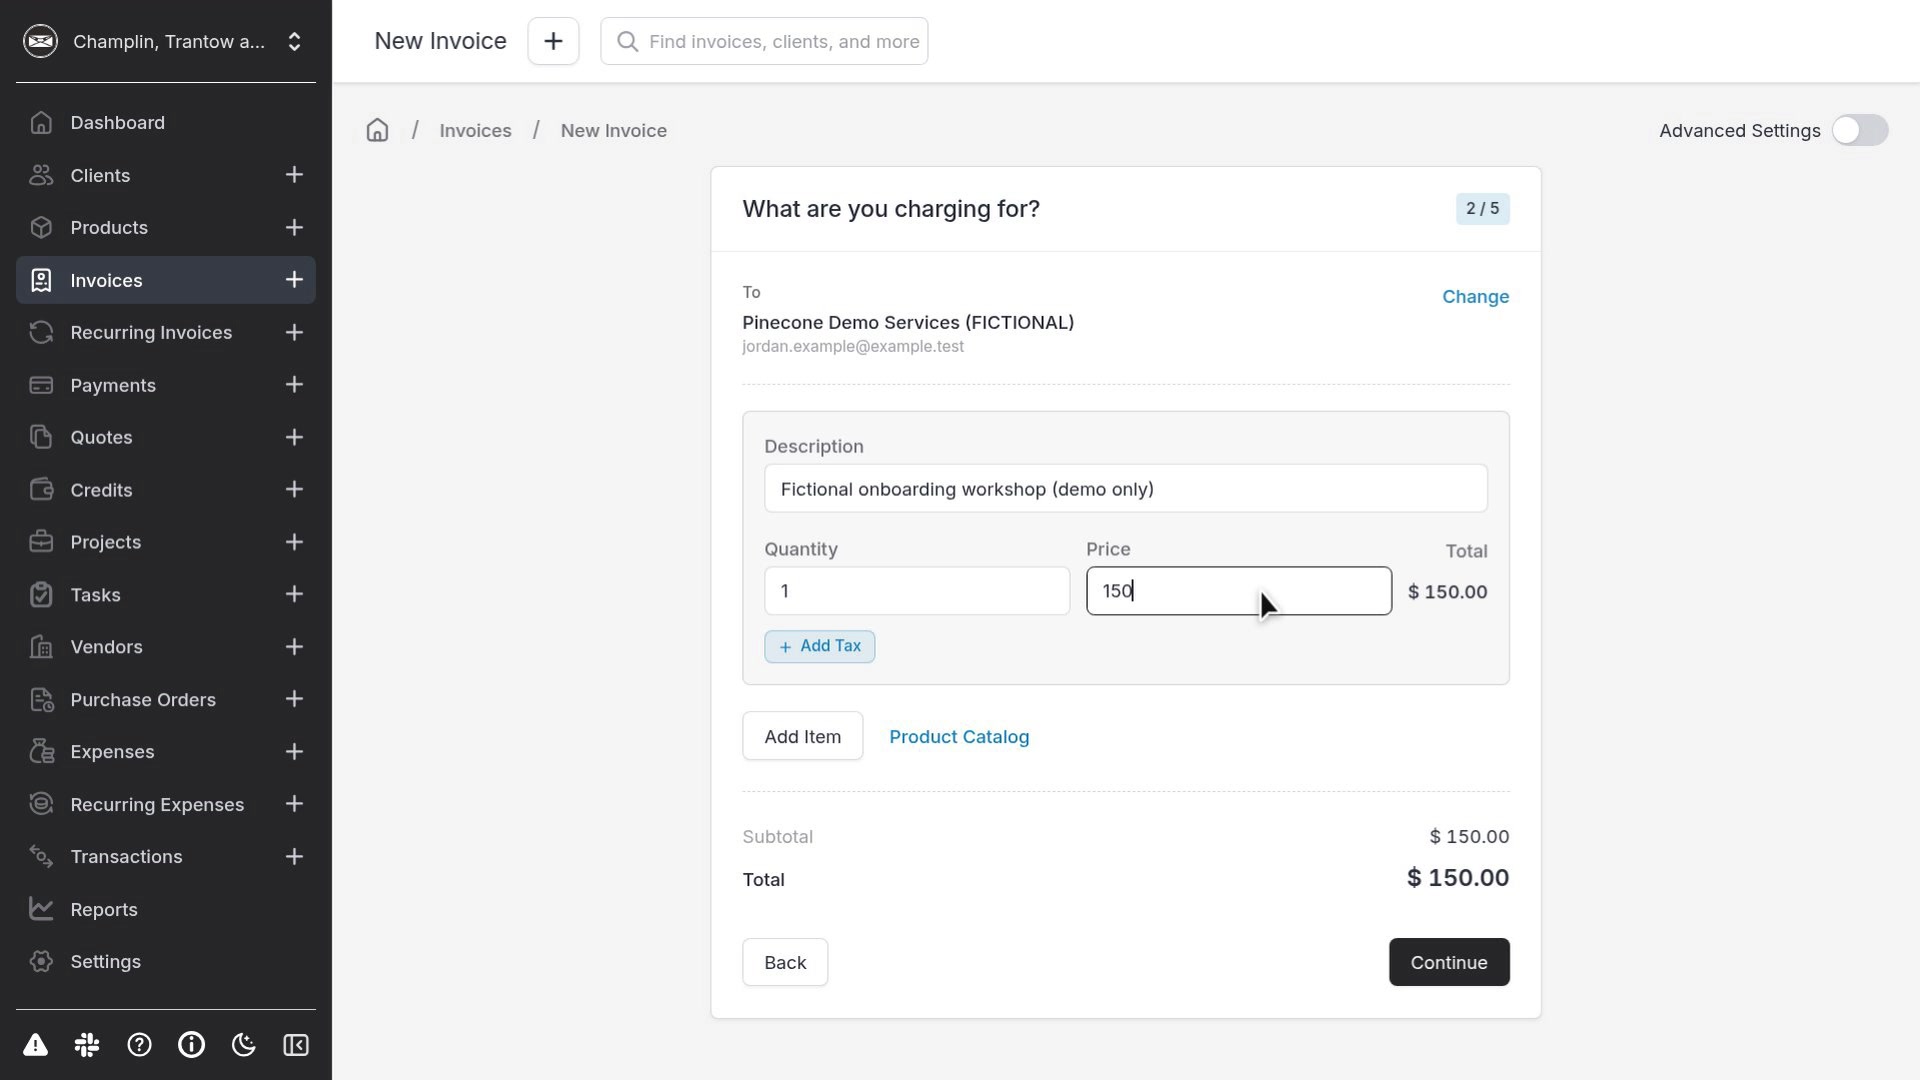
Step 2 of 5 asks what you are charging for. Enter a description and a unit price. Quantity defaults to 1.
For this walkthrough:
- Description:
Fictional onboarding workshop (demo only) - Price:
150
The total should update to $150.00. Click Continue.
Step 4. Payment terms and notes
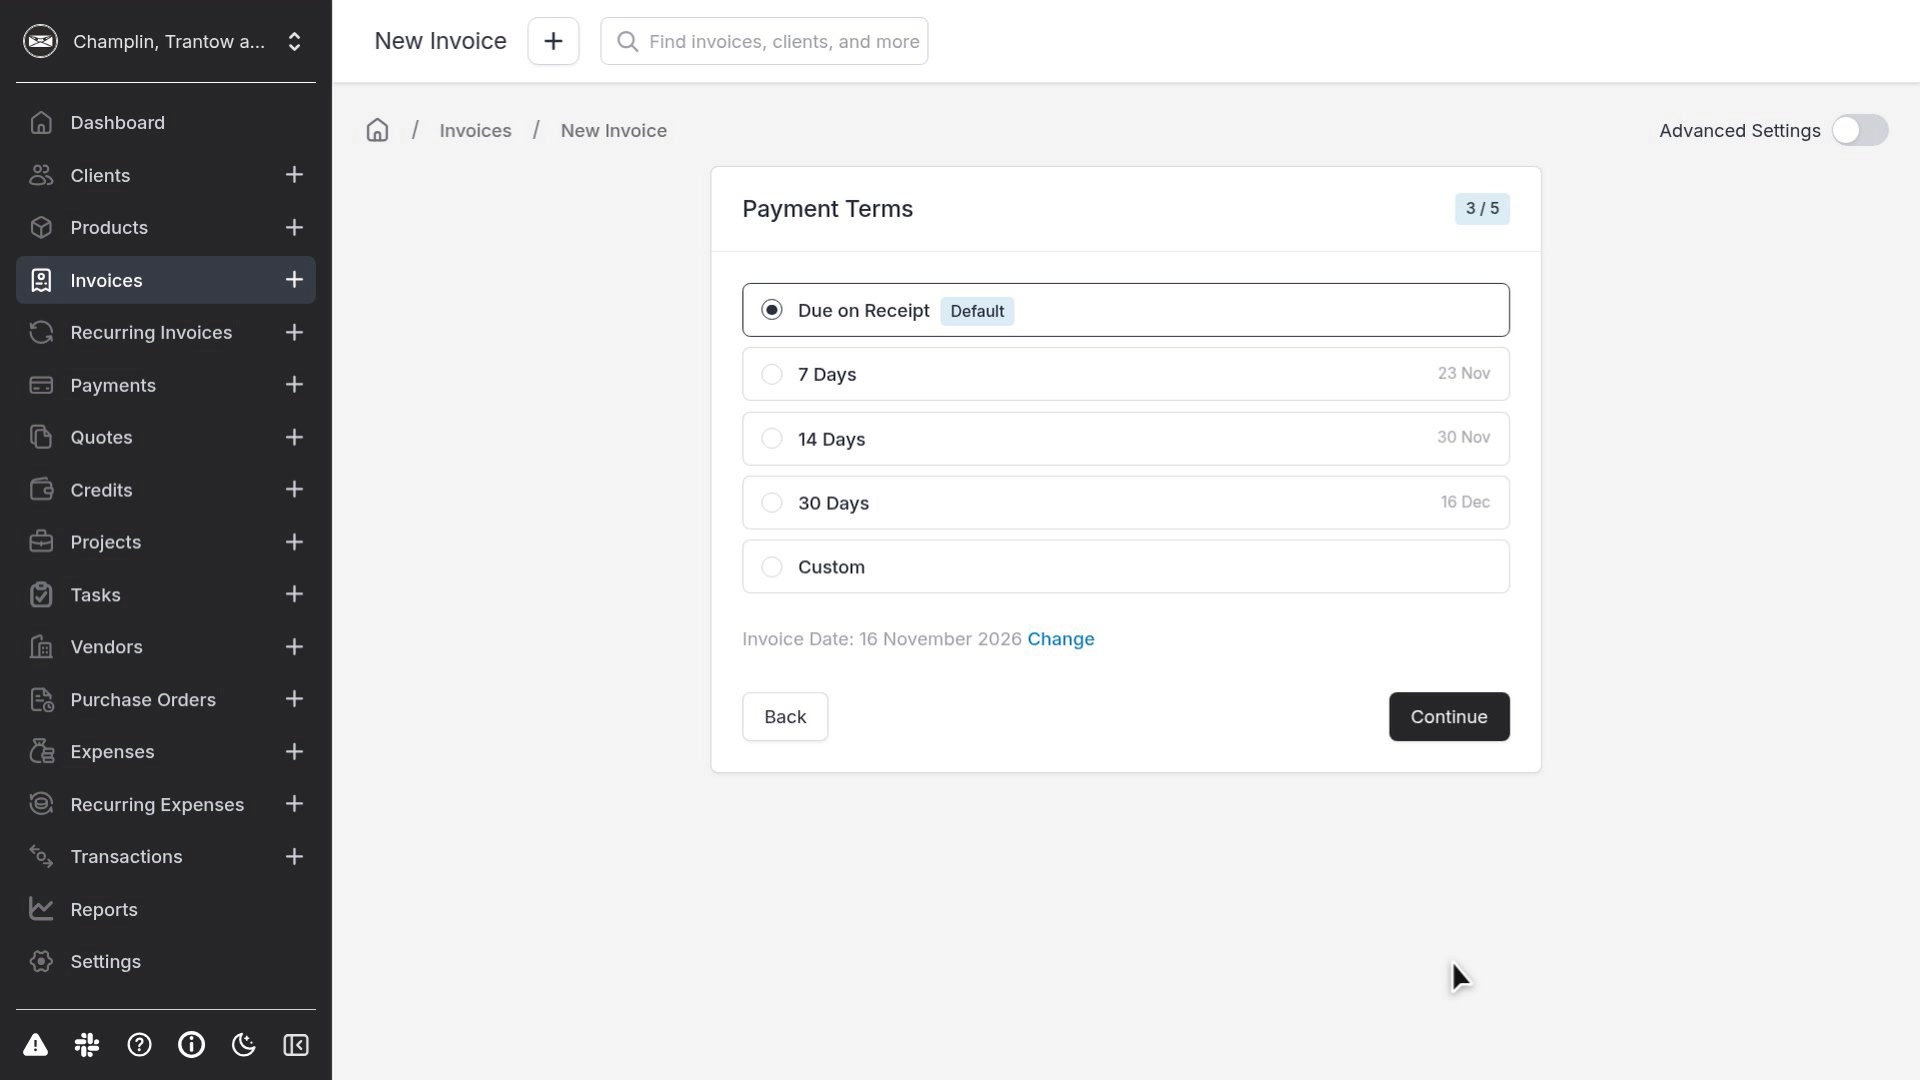
Step 3 of 5 is Payment Terms. You can leave the default, Due on Receipt, and click Continue.
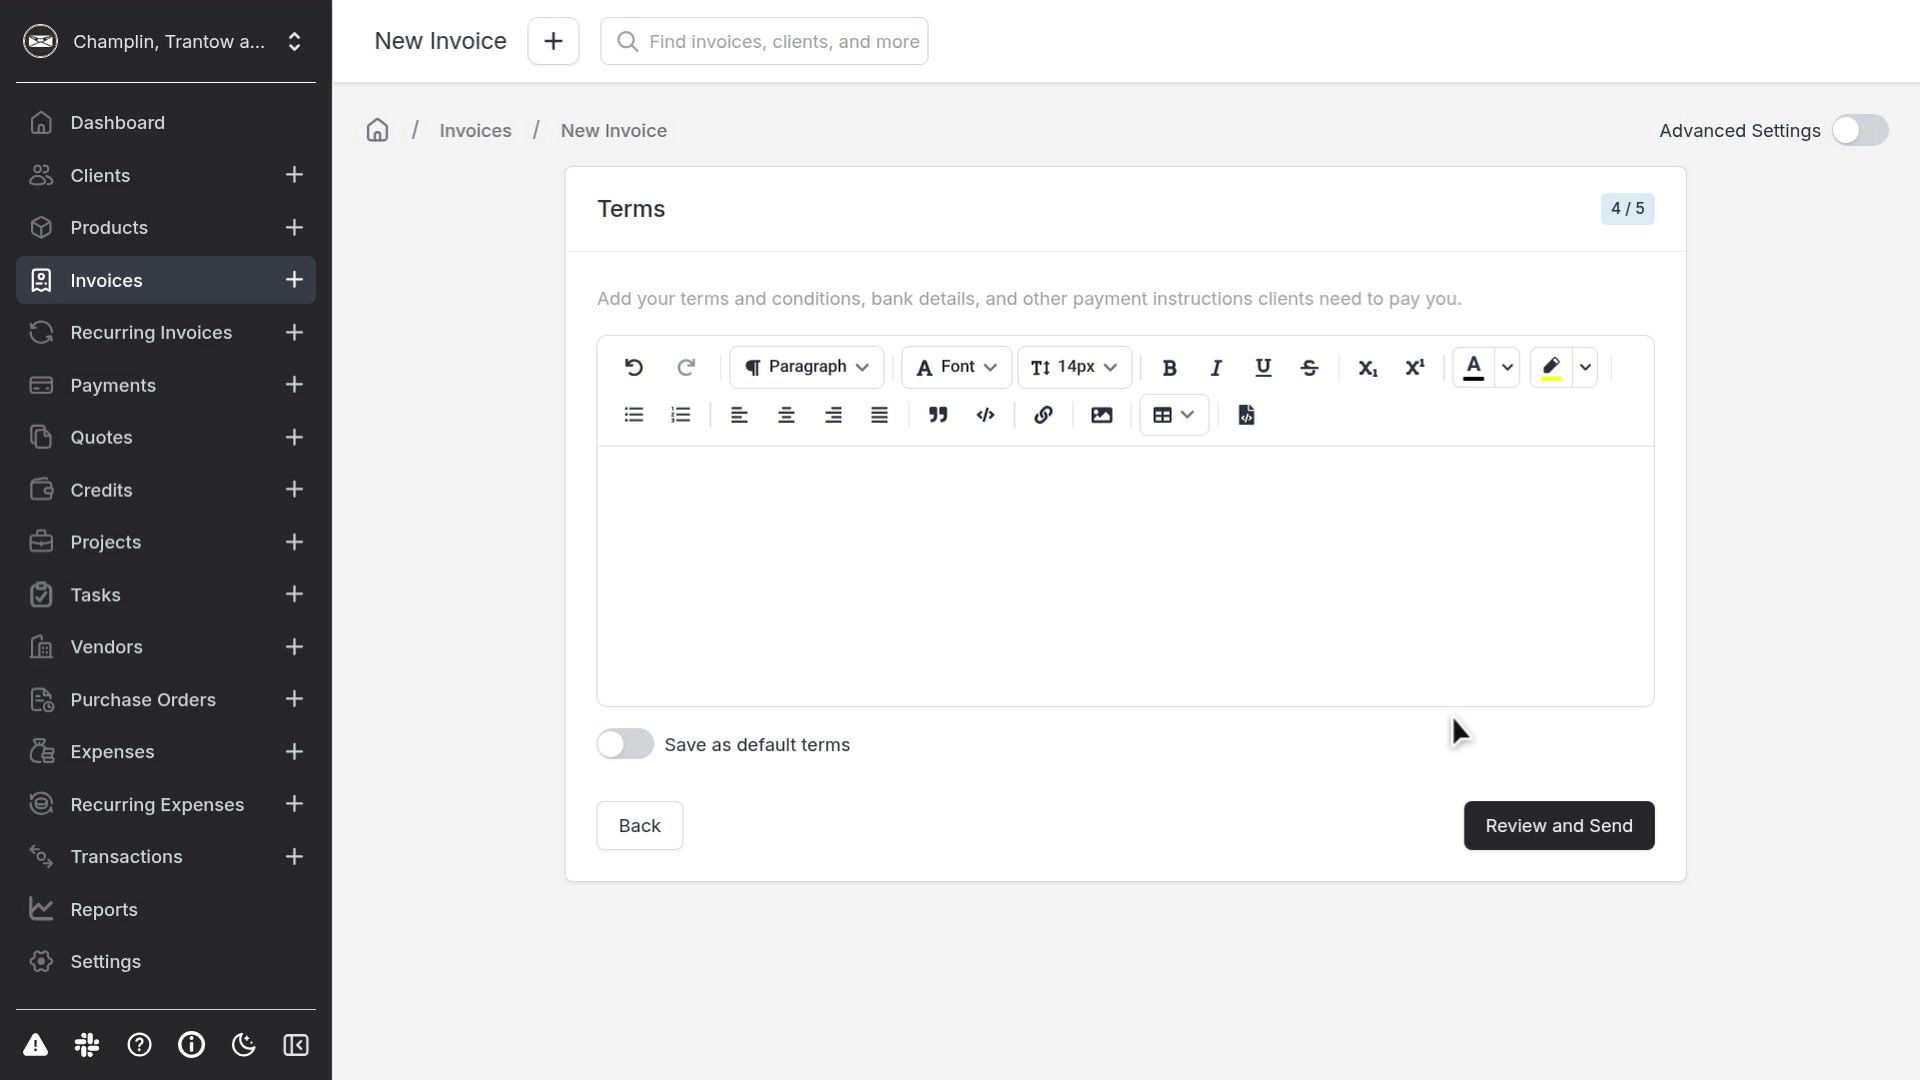
Step 4 of 5 is Terms, for terms and conditions or payment instructions. This demo leaves the field blank. Click Review and Send.
Step 5. Review — and stop before Email Invoice
Step 5 of 5 shows a preview of the invoice. Scroll to the bottom of the page. You will see two actions:
- Save Draft — stores the invoice without notifying anyone
- Email Invoice — would send a message to the contact on file (
jordan.example@example.testin this demo)
Because this is a shared public demo, do not click Email Invoice, and do not send any mail. In your own account, you would choose Email Invoice, review the message, and then send it.
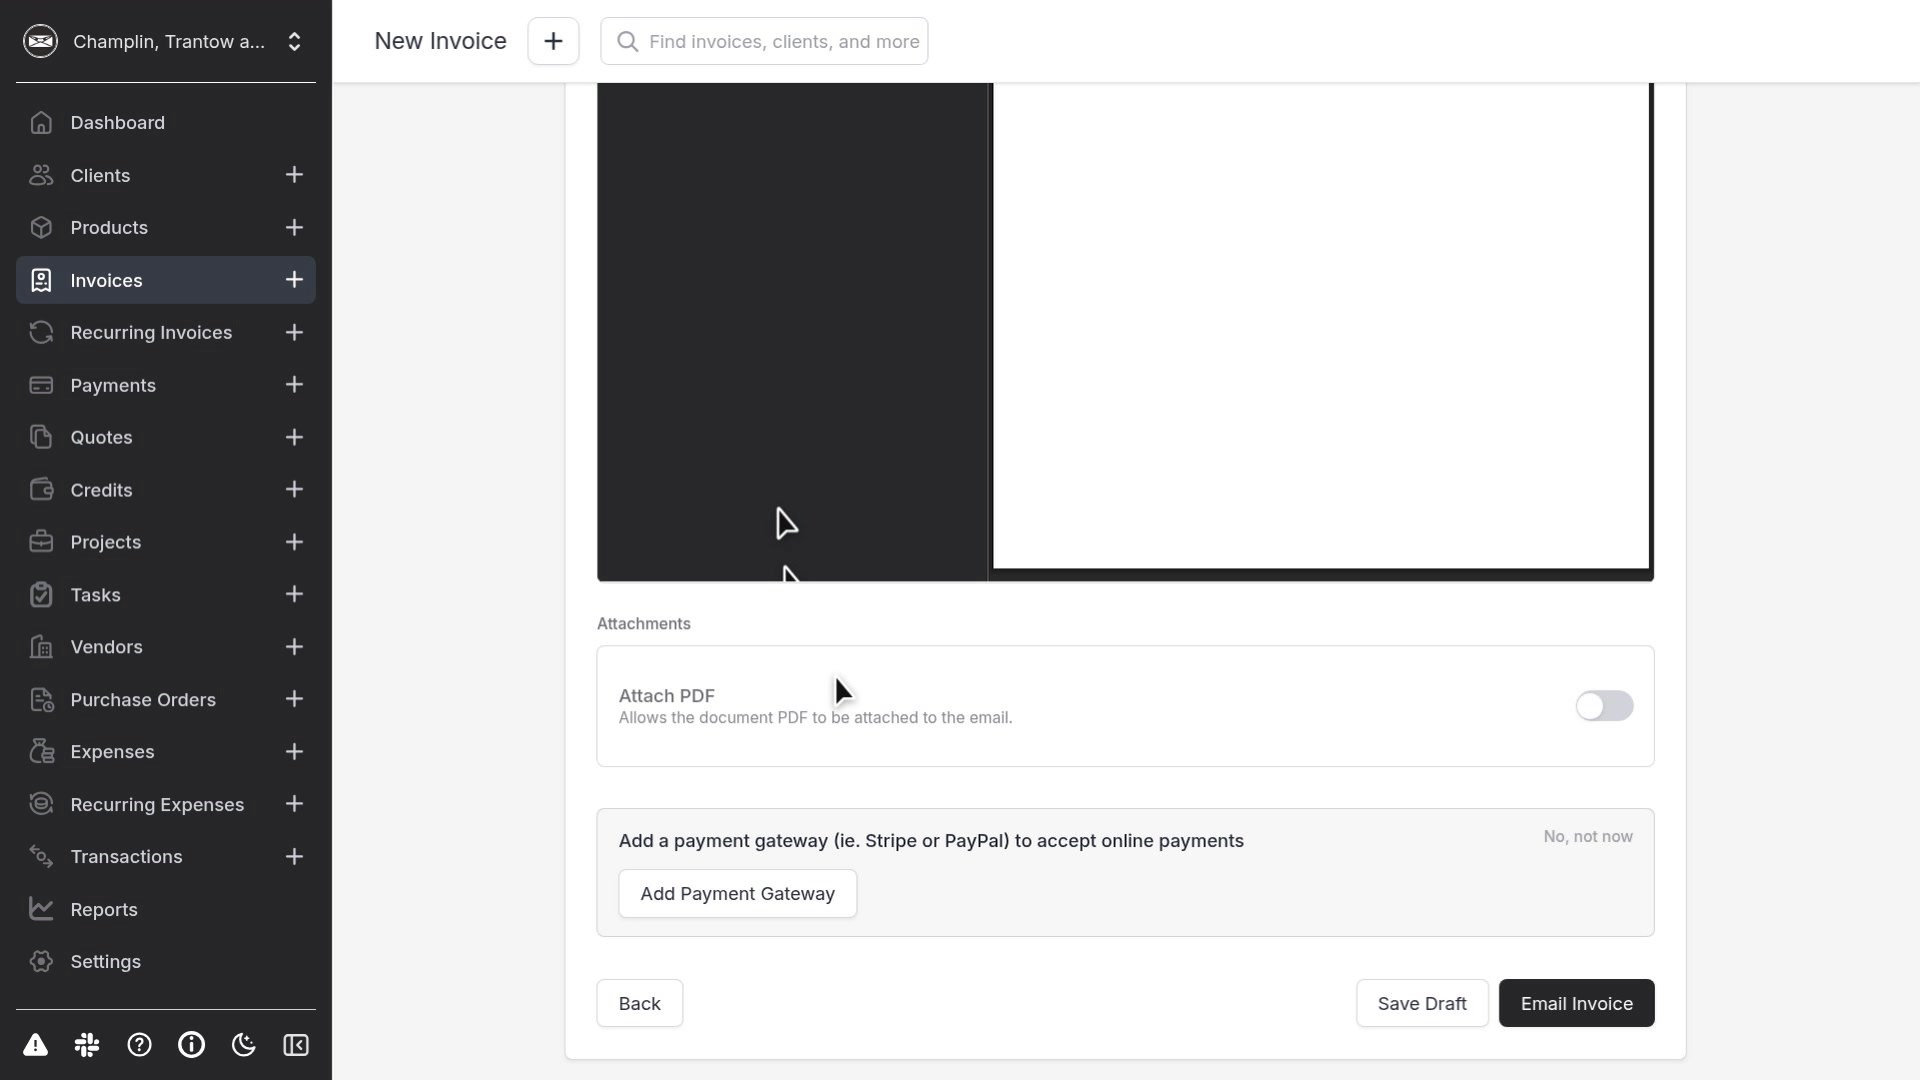
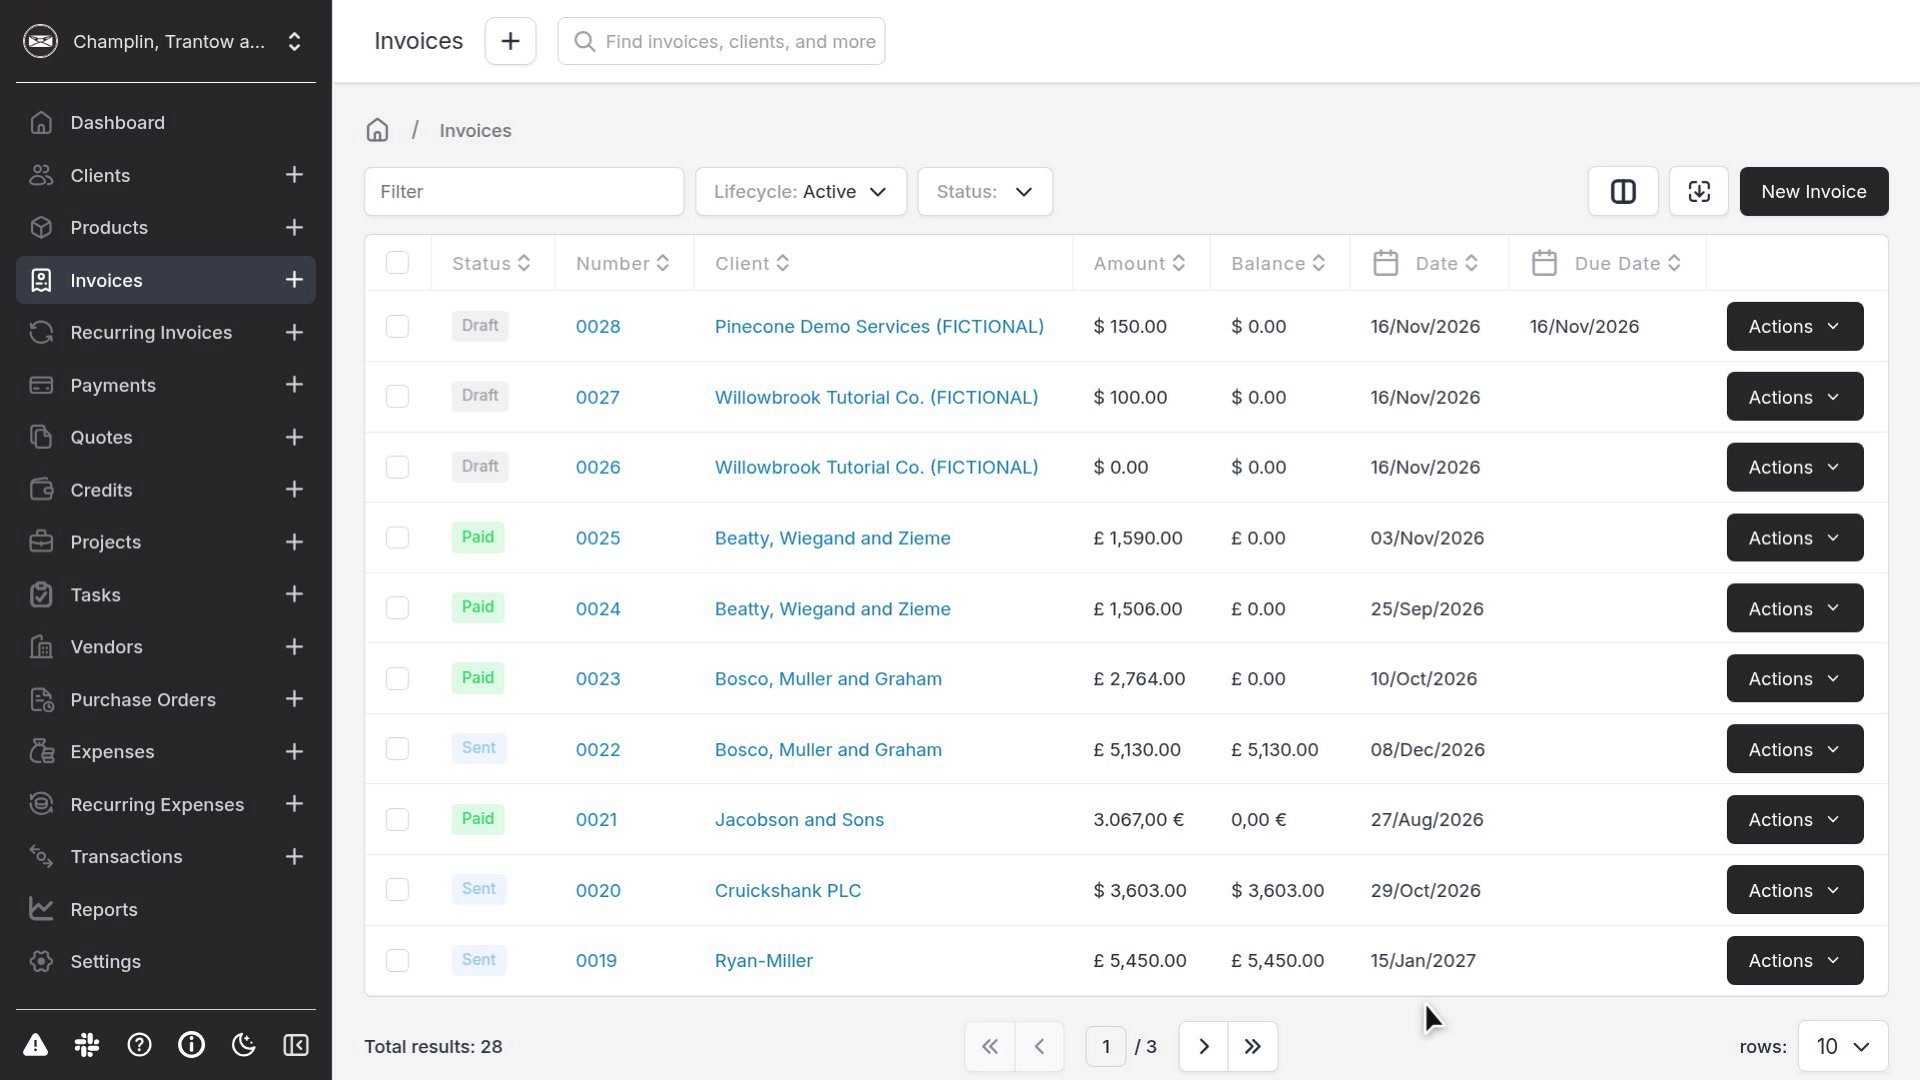
For this walkthrough, click Save Draft. Invoice Ninja returns to the Invoices list with a confirmation, and the new invoice appears as a Draft (in this recording, invoice 0028 for $150.00, dated 16 November 2026).
Notes
- A draft invoice has no balance due until you mark it sent. Mark Sent (in the invoice Actions menu) only changes the status; it does not email the client. That is the safe next step before recording a payment. See How to record a payment.
- Do not use Email Invoice on the public demo.